Make Cute Paper or Foam Visors : A Fun Craft and a Bookworm

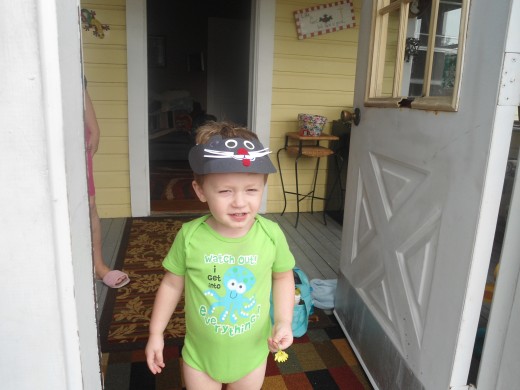
Baby Grandson Wearing a Visor
Visors can be used for many purposes
- to make children look cute
- to shield the sun from their eyes
- to identify them as belonging to a group (as for a field trip)
- to use for a specific purpose (such as lunch numbers at school until they learn them)
Make and Wear
Parents and grandparents are always looking for fun things, creative things for their children and grandchildren to make or do. You will want them to activities that keep their interest and are memorable.
Making visors is one of those activities. After they are made, happy little children will be wearing them. My daughter fell asleep with hers on when she went to bed years ago when she made her first one.
Visors are an accessory that many of us use all year long, not just in the summer. With vacation time coming, making visors will be an activity of choice for your children.
One summer, a job I had was working as a counselor at a YMCA Camp in Albany, Georgia One of the activities we did was crafting. Making visors was always a hit.
General supply list & General Instructions...
- Large craft foam sheets
- Construction paper
- Stapler
- Markers
- Googly eyes
- Glue
- Felt ( optional)
- Yarn (optional)
- Glitter (optional)
- Faux gems (optional)
What to do :
- Make templates for a visor. Simply draw visor shapes on cardstock or old manila folders.
- Have children trace the visor pattern onto their craft foam.
- Have children decorate as desired.

Kitty Cat Visor
To make this visor
- use a large sheet of craft foam (you can make several visors from one sheet of the foam)
- Be sure that you have made templates so that children can cut out their own visor.
- Then allow children to make eyes, a nose, tongue, whiskers, ears.
- How they accomplish that will be up to you.
- They can use googly eyes for the eyes or make their own from craft foam.
- The nose and tongue can be made from construction paper, foam, or felt.
- Whiskers can be made from yarn, or, as shown in the sample.
- To make the whiskers, I cut a small piece of construction paper about 3 inches by 2 inches. I cut little strips down to within about 1/4 of an inch from the bottom of the paper. Then I fanned them out somewhat so that appear to be whiskers. Of course, you can always use yarn but it is a bit tedious for little guys and gals.
- Then, the children can glue all of the pieces on the visor.
- For the strap to hold it onto their head:
- Cut strips of paper about 21/2 to 3 inches thick and about 12 inches in length; that gives you a little extra to work with as you measure them to fit little heads. Staple them to the visor and they are finished.

Field Day Visor
This one is so simple and yet it gives a sense of unity to the class. You can use this for Camp, family outings, and family reunions. It is not a good idea to write a child's name on these if you will be out in public as it leaves them wide open for a stranger to approach and act as if they know them.
Cut visor from foam colors as you desire.
Give children markers, glitter, glue, and other materials that you would like for them to use to decorate the visor and make it their own.


Elephant Visor
This is the cutest little elephant visor.
In the top photograph (above), you see the pieces you will need. This takes patience and more time than the others. You might want to have a helper when you do this one.
- Make templates of the visor and ears for children to use to create their own.
- Have children trace and cut out the visor and the ears. If you can find gray craft foam, use that. If not there is always card stock.
- For the one pictured, white copy paper was used and colored gray. The coloring was done so that is made the skin look wrinkled. That is why the lines of colored pencil are not all going in the same direction.
- To make the trunk, fold paper as shown in the photograph, so you make an accordion fold. Color it as well and attach it to the visor as shown.
- Children can make eyes from the craft foam or use googly eyes.
- Follow the same procedure for the strap that will allow the visor to be worn as was explained above.
Most of these ideas I have used for years.
The elephant idea came from Alternatives to Worksheets by Creative Teaching Press which I have cited before in my articles.
Keeping a record of reading
Do you have a bookworm at your house? Hopefully this summer your bookworm or worms will read, read, read. It is a wonderful time to get caught up on reading. Reading just for the pleasure of it is a memory that we carry with us all of our lives. When I was a young girl, I read the Nancy Drew stories each summer.
A really fun way to keep a record or to 'brag' about how many books that are read is to make a bookworm for your walls. It is simple to make and will get everyone excited about reading. For those little guys who are not actually reading yet, someone can read books to those little guy and gals.
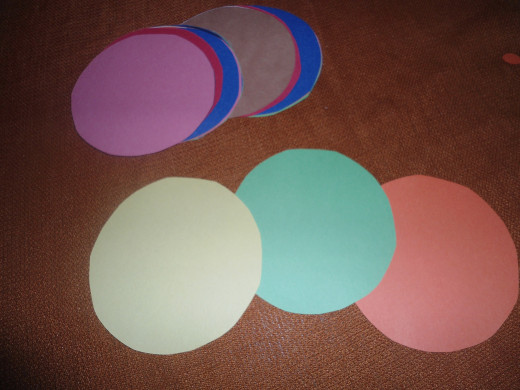
Preparing to Assemble Your Bookworm
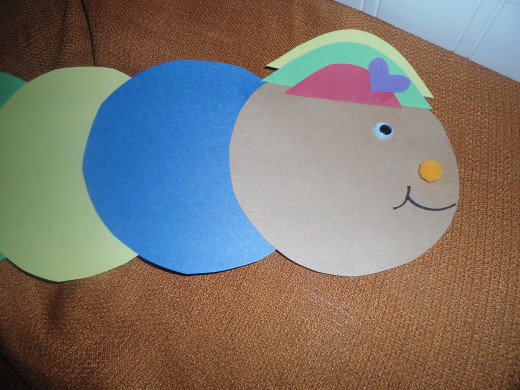
(wall) Bookworm Is Comng Together
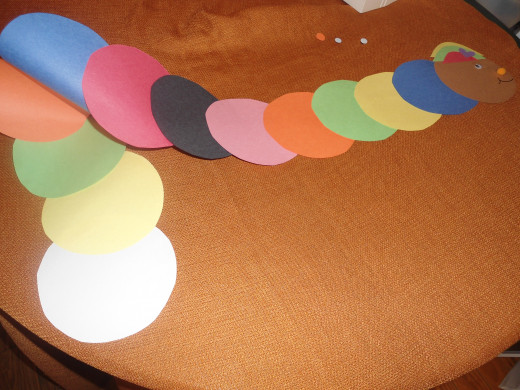
After each book, add a new section to the body of your bookworm
Reading log
Select construction paper or craft foarm
· Use an object to make 5 inch circles
· Cut out 15 or 20 circles ...you may need more later
· Decorate the face...use googly eyes, a pompom for the nose, and draw on a smiley face
· Put the face up on a wall where you can add the circles ...pieces of the bookworm's body to it.
· When the first book is read, give a circle to the family member who read it and have the name of the book written on the circle, and attach it to the 'head.'
· Continue in this way with each subsequent book read.
· You may end of with a bookworm that winds throughout your home.
Bookworm Magnet
Select construction paper or craft foam
· Use an object to make 5 inch circles
· Cut out 15 or 20 circles ...you may need more later
· Decorate the face...use googley eyes, a pompom for the nose, and draw on a smiley face
· Put the face up on a wall where you can add the circles ...pieces of the bookworm's body to it.
· When the first book is read, give a circle to the family member who read it and have the name of the book written on the circle, and attach it to the 'head.'
· Continue in this way with each subsequent book read.
· You may end of with a bookworm that winds throughout your home.
Bookworm Magnet
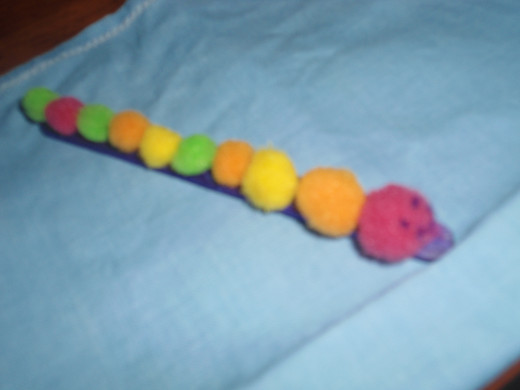
This cute little bookworm magnet will make you smile each time you see it on your refrigerator. The little pompoms will come off unless it is handled carefully. You might explain that before it is made.
Supplies:
- colorful pompoms
- glue
- Popsicle sticks
- ·marker
What to do:
- Glue to the Popsicle stick
- Glue on about pompoms on the stick. Decorate one with eyes and a mouth, then glue it on. Let dry.
- All set, ready to use.
These little activities are just a few more to add to your storehouse of creative ways to spend time with your children. Simple, inexpensive, fun ways to spend time with your family are at your fingertips.
© 2012 Patricia Scott


")
